Tips for Antiquing Terra Cotta Planters

Our slugs and bunnies are very fond of tiny new plants…but..I have learned that if I let the seedlings grow up a bit before placing them in the ground, they have a better chance of survival. So…I decided to create a “seedling” area in our garden to propagate new plants.
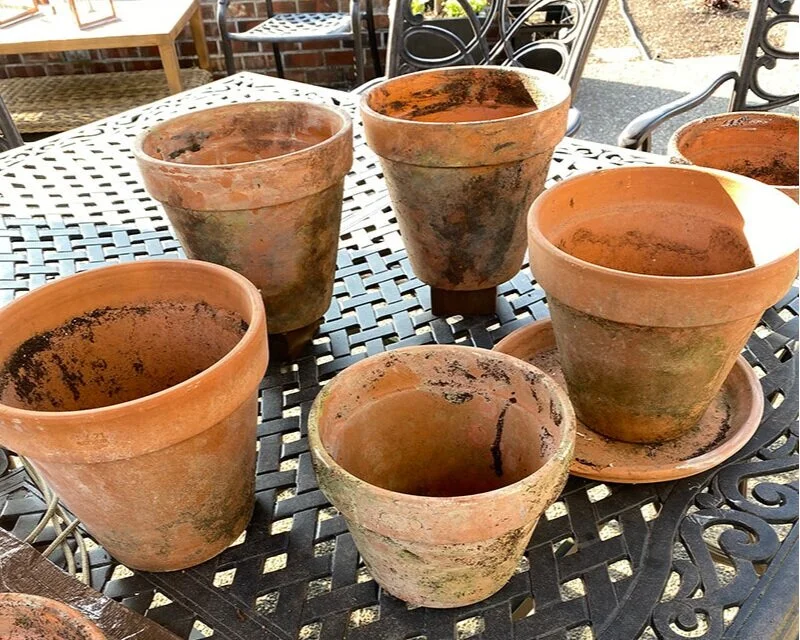
My first plan was to buy “antique looking” pots for this purpose but they were all “sold out”. So…plan B was to see if I could antique new pots or use something that I already had. After doing a thorough search of our garage cupboards I found a mix of old and new terra cotta pots. Some of them…to my surprise already had a nice patina and I used those for my antiquing inspiration for the new pots.

This is the process that I used and I bet you have everything you need to antique terra cotta pots
in your craft supplies.

Gather the pots that you want to antique.
I suggest having a few photos of “real” patina pots to use as a color guide.


Cover your work surface with a tarp or painting cloth.


Supplies you will need
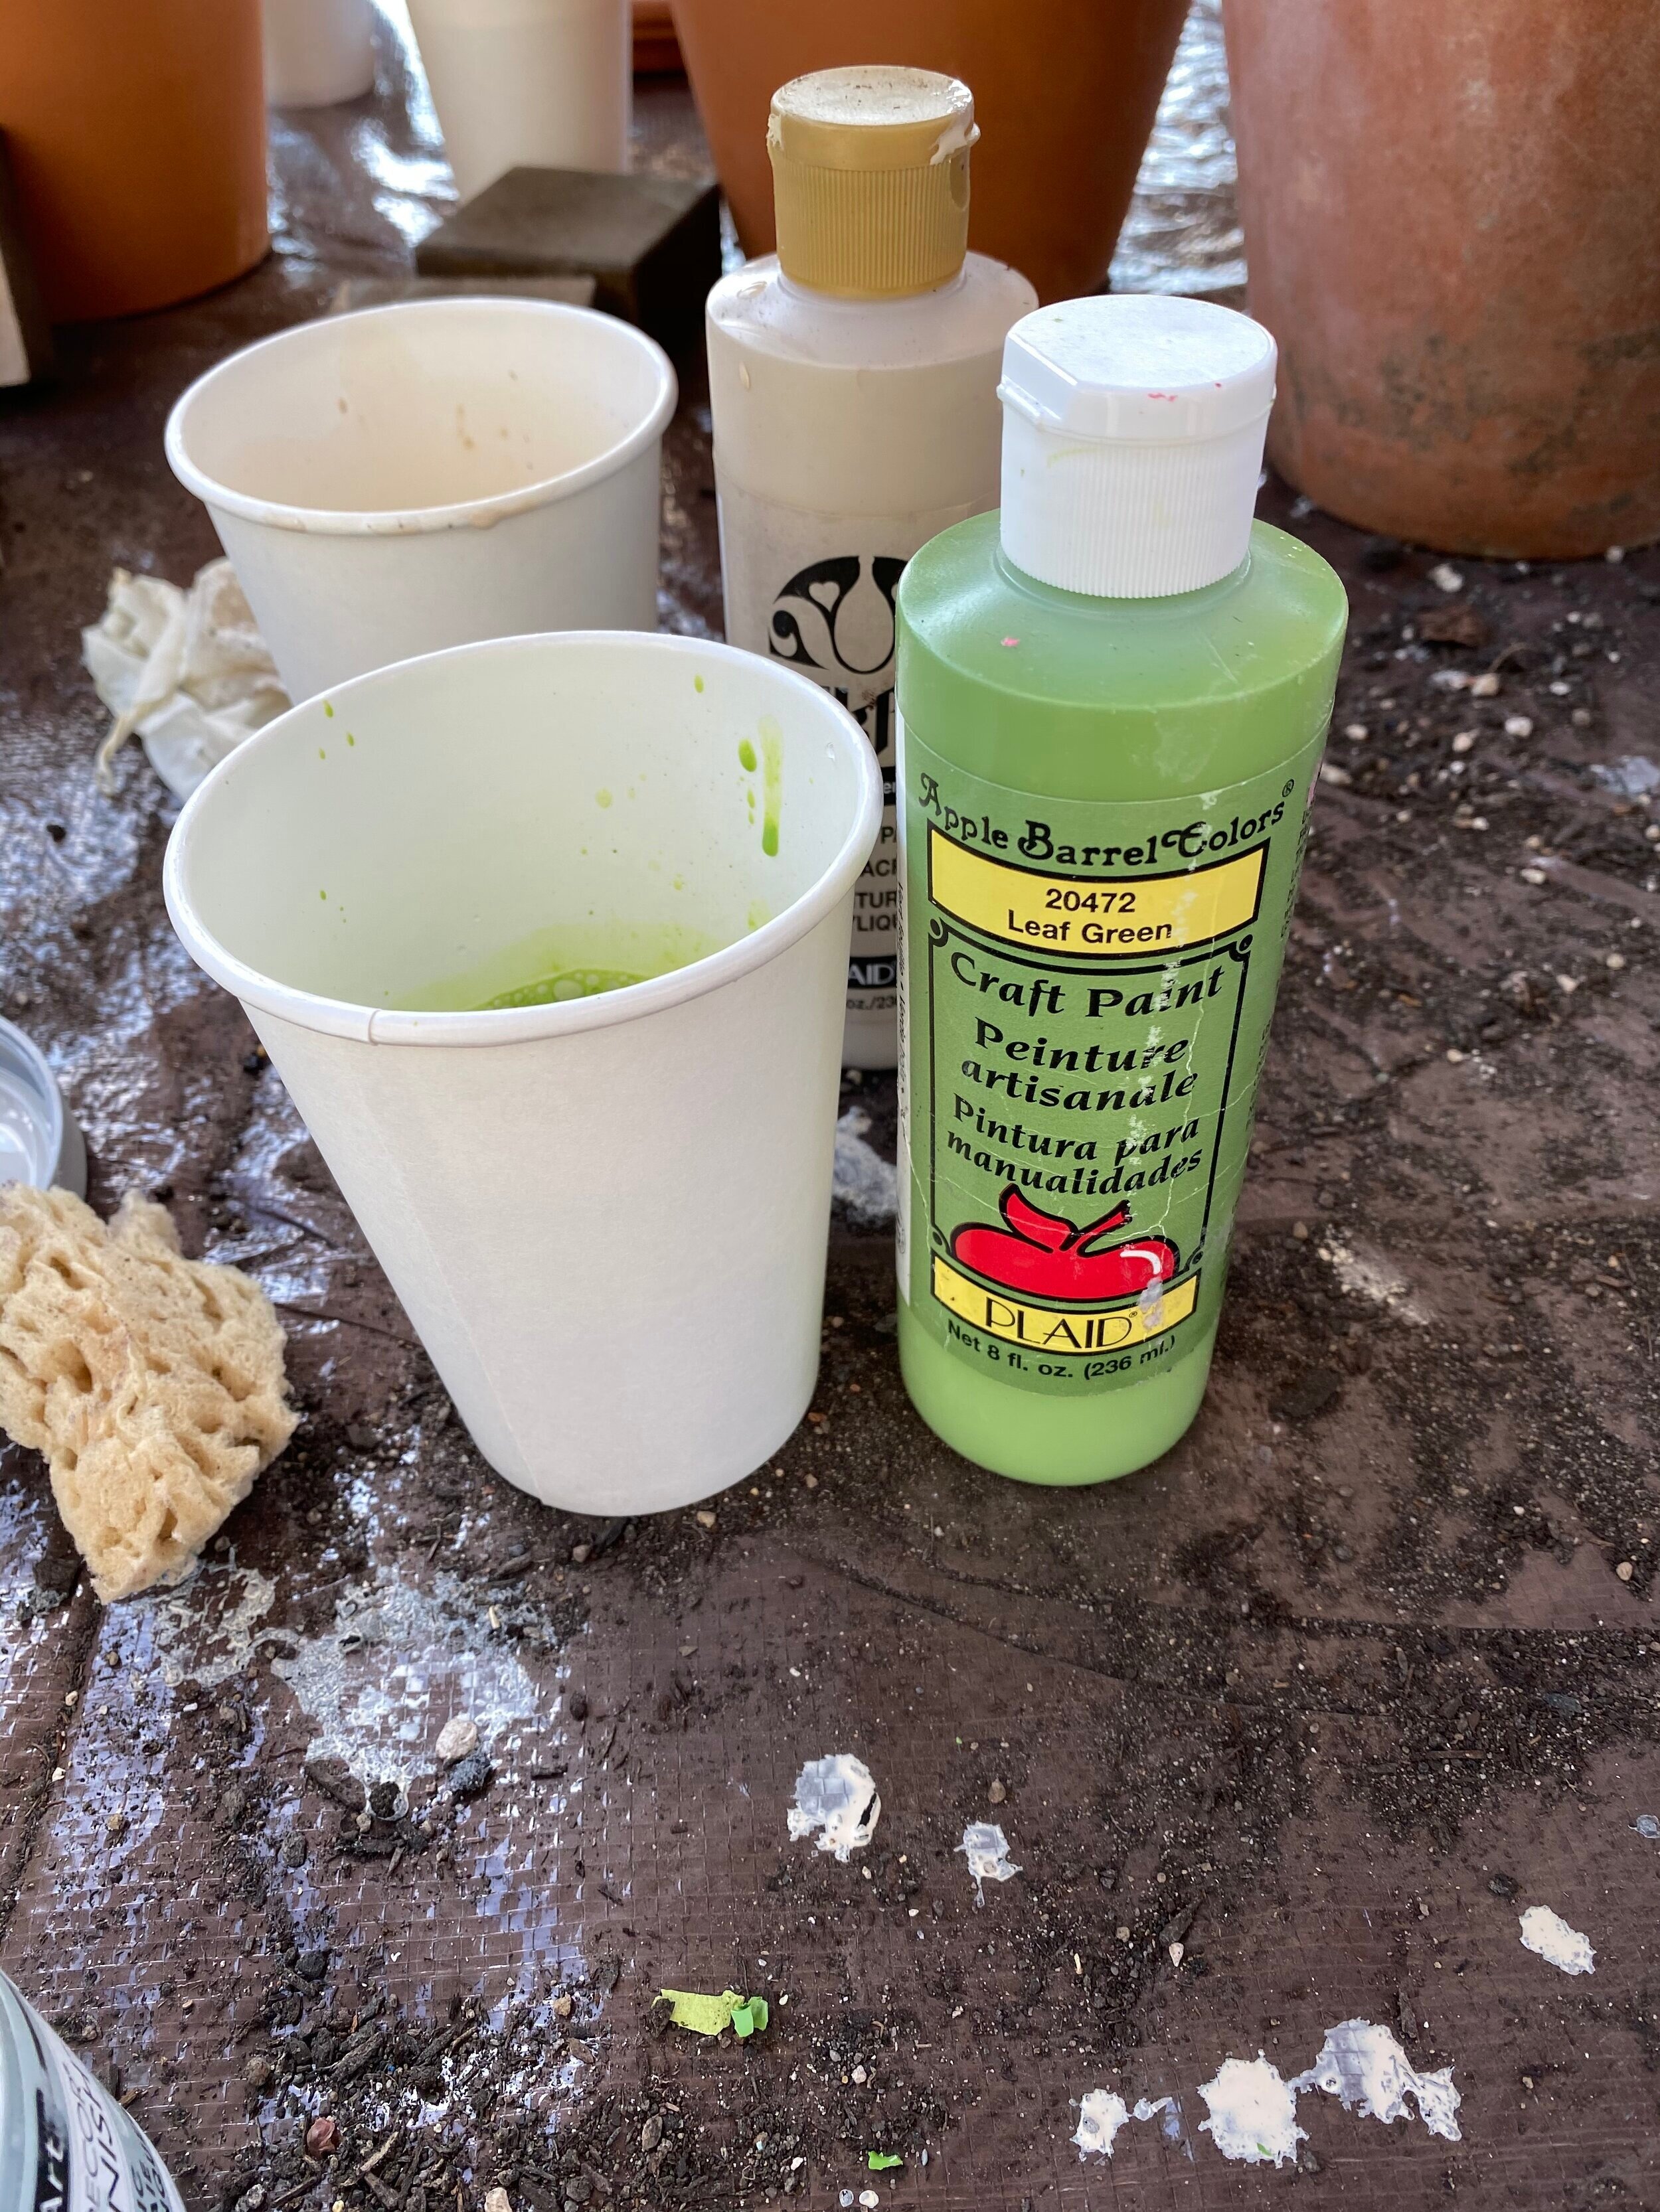
rubber gloves
paper cups and water
a variety of acrylic paint in cream, green and brown tones
thick craft glue or gel medium
sponge and a foam paint brush
dirt…yes…dirt! This is a key ingredient!

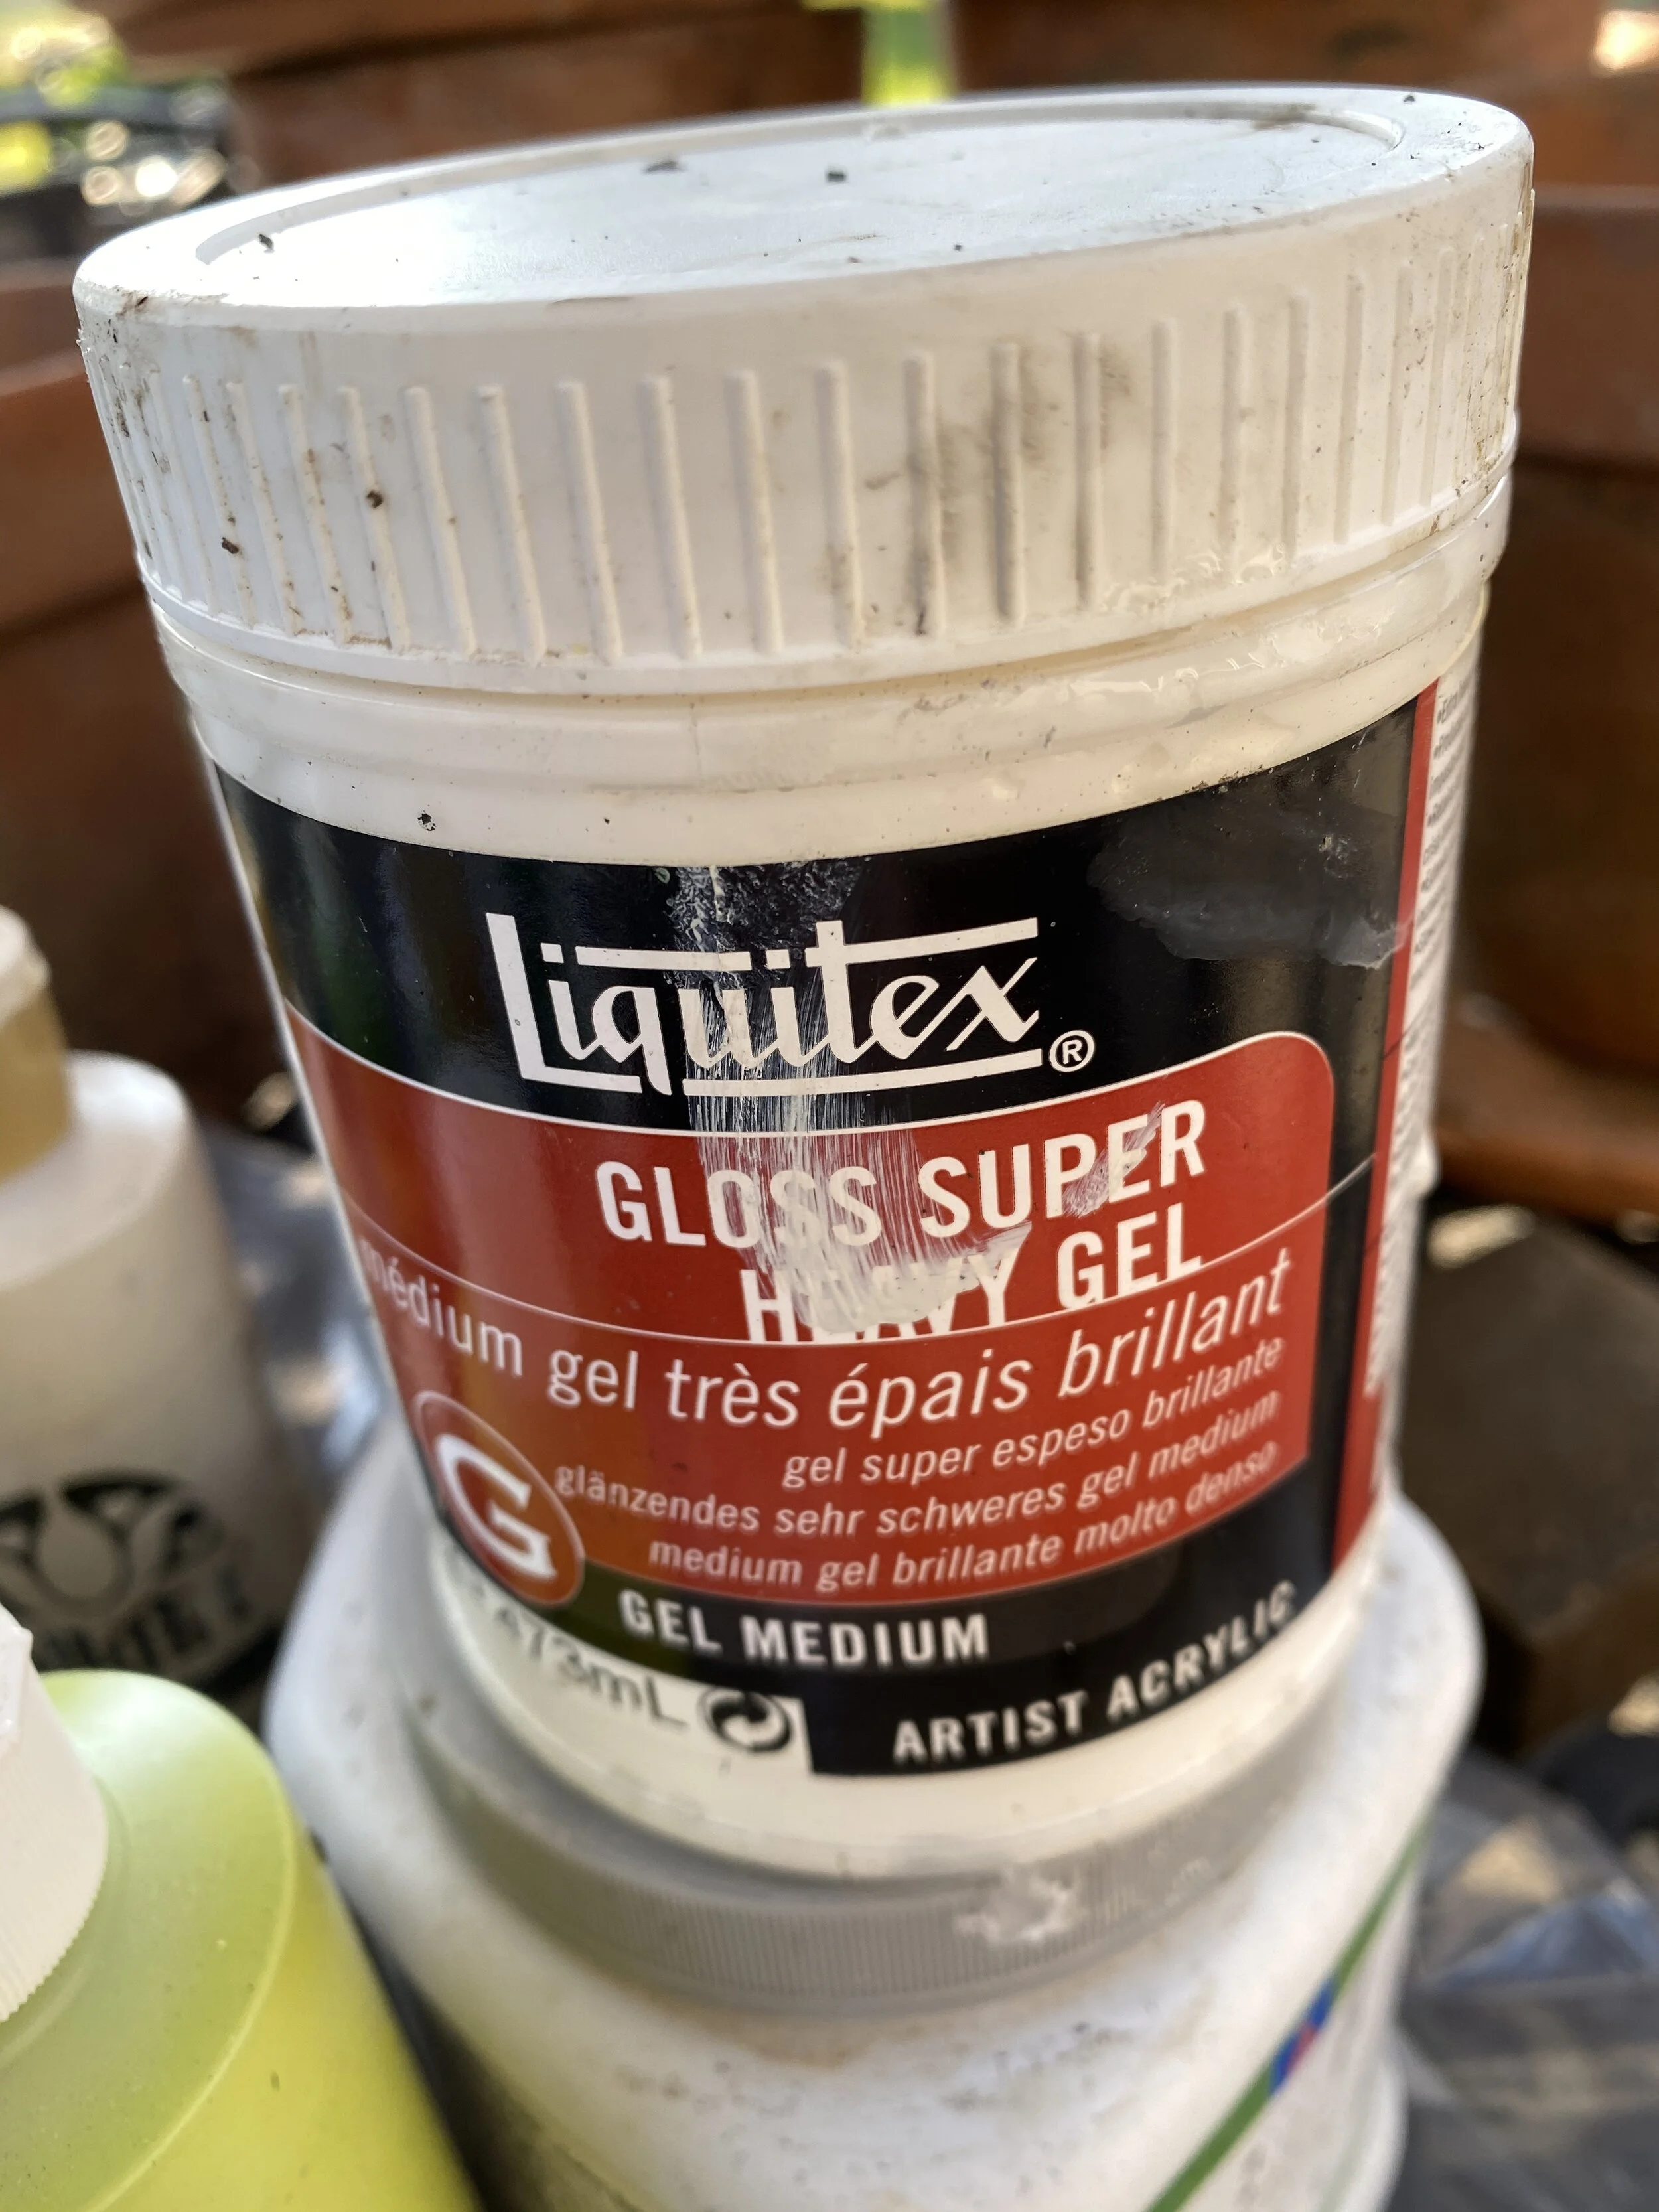

Apply gel medium (or thick craft glue) to areas of the terra cotta pot in various thicknesses.

With gloves on…apply dirt to the pot. You can pat it onto the pot with your hand or roll it in the dirt.
I used both methods but found it was easiest to apply the dirt on with my hands.
Let the dirt dry on the pot for a minute and then rub the excess off with your hand.

Next…fill several paper cups with 3/4 cup of water. Add a about ten drops of acrylic paint to each cup. I used cream, brown, and two colors of green. It’s important to have very watery paint so it will soak into the pot and leave only a subtle amount of color.
Apply the cream paint with a foam brush…then work quickly to rub the paint into different areas of the pot. Leave some areas without paint. The dirt will mix with the paint to create a natural color. Use your inspiration photo to imitate the patina.

Continue by adding a small amount of green and brown paint to the pot with a sponge. Before the paint drys, pat it with your gloved hand to settle the patten left by the sponge.
If you apply too much paint…just rub more dirt over the paint.
Don’t forget to apply paint and gel medium and dirt to the inside edge of the pot!

I did not spray these with a sealer because they will live outside and will continue to naturally patina. But…if you are going to put your pots inside, I would suggest a clear matt sealer to protect the finish.


One project leads to another project at our house…
this weekend we will be building a new potting shelf for the pots!